|
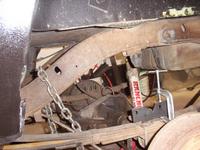
Checking droop
Checking droop
Date: 12/31/1969
Views: 1620
|
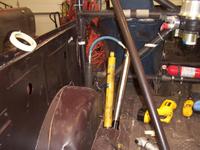
Roughly where I thought the shocks would come up
Roughly where I thought the shocks would come up
Date: 12/31/1969
Views: 1133
|
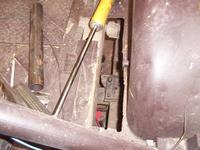
Shorter slot on the passenger side after I decided the shocks could be run straight up, not angled.
Shorter slot on the passenger side after I decided the shocks could be run straight up, not angled.
Date: 12/31/1969
Views: 1264
|
dcp 0014
dcp 0014
Date: 12/31/1969
Views: 1076
|
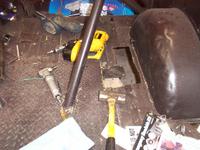
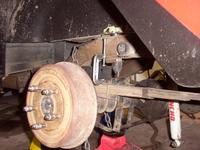
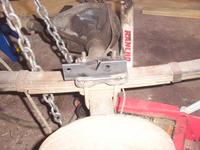
Holding the new U-bolt plate based lower mount in place for testing
Holding the new U-bolt plate based lower mount in place for testing
Date: 12/31/1969
Views: 1293
|
|
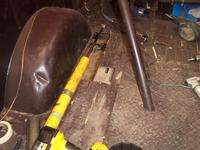
See the lower mount?
See the lower mount?
Date: 12/31/1969
Views: 1043
|
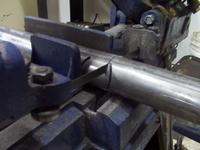
To build the uprights for the hoop, I hole-sawed a single piece of tube, then cut it in half on the bandsaw
To build the uprights for the hoop, I hole-sawed a single piece of tube, then cut it in half on the bandsaw
Date: 12/31/1969
Views: 1736
|
To build the uprights for the hoop, I hole-sawed a single piece of tube, then cut it in half on the bandsaw
To build the uprights for the hoop, I hole-sawed a single piece of tube, then cut it in half on the bandsaw
Date: 12/31/1969
Views: 1305
|
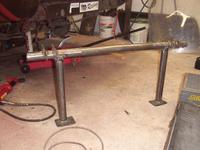
First mock up of the uprights
First mock up of the uprights
Date: 12/31/1969
Views: 1127
|
Checking "bump" clearance
Checking "bump" clearance
Date: 12/31/1969
Views: 1199
|
|
For the upper mounts, I hole-sawed some flat stock, which I then cut in half lengthwise to make a total of 4 tabs
For the upper mounts, I hole-sawed some flat stock, which I then cut in half lengthwise to make a total of 4 tabs
Date: 12/31/1969
Views: 1351
|
The uprights
The uprights
Date: 12/31/1969
Views: 1250
|
dcp 0023
dcp 0023
Date: 12/31/1969
Views: 4245
|
dcp 0024
dcp 0024
Date: 12/31/1969
Views: 1661
|
dcp 0025
dcp 0025
Date: 12/31/1969
Views: 1176
|
|
Welding
Welding
Date: 12/31/1969
Views: 1674
|
dcp 0027
dcp 0027
Date: 12/31/1969
Views: 1067
|
dcp 0028
dcp 0028
Date: 12/31/1969
Views: 1250
|
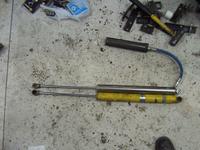
Comparing a 7100 Remote Reservoir to a 5125 for ideas on how to affix the upper tabs
Comparing a 7100 Remote Reservoir to a 5125 for ideas on how to affix the upper tabs
Date: 12/31/1969
Views: 1426
|
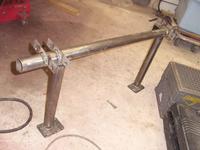
After welding the mounts onto the bolt-in upright hoop.
After welding the mounts onto the bolt-in upright hoop.
Date: 12/31/1969
Views: 1448
|
|
dcp 0002
dcp 0002
Date: 12/31/1969
Views: 1990
|
dcp 0003
dcp 0003
Date: 12/31/1969
Views: 1217
|
U-bolt plates after welding the lower mounts to them. They are offset to the outside of the vehicle.
U-bolt plates after welding the lower mounts to them. They are offset to the outside of the vehicle.
Date: 12/31/1969
Views: 3021
|
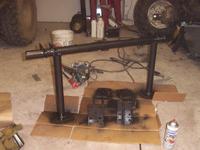
Paint
Paint
Date: 12/31/1969
Views: 1322
|
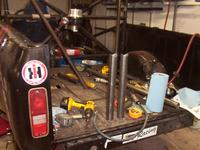
Preparing to tear down one of the 7100s for revalving and a seal replacement on the reservoir
Preparing to tear down one of the 7100s for revalving and a seal replacement on the reservoir
Date: 12/31/1969
Views: 1302
|